利用Gradio框架搭建Gemini-nano-banana

该工具流程主要是面向需求量集中,使用人群面向团队内部,小组群体。方便管理者统一核算成本。下面分享我使用的开发工具是阿里最近推出 Qoder(使用的是 Qwen 大模型),接入 Gemini-nano-banana的api ,并通过 Gradio 框架搭建一个简单的 web 界面。

1、通过Qoder编写一个简单的web文生图界面

新用户 1000 个积分,我的使用感受下来是能够满足基本的功能搭建,我是没有任何代码阅读能力的,所以全程都是从一个视觉设计师的角度来请求命令,产生的 bug 较多。当通过一条命令要求生成小猫图片后,1000 个积分已经消耗完毕。完成的界面效果图如下:

这个界面左侧是任务列表,右侧是对话列表(上半部分是当前任务的生成记录,下半部分是输入框),可以上传图片、局部重绘,以及底部的提示词范本。这还是基本效果,细节布局还待优化,耗时1天搭建。

2、我是如何接入 Gemini-nano-banana 的 API ?

一开始我尝试使用 Google AI studio 获取 api,提供 api 的示例样本给到 Qoder,测试下来能够调用成功,但是会出现 404,通过排查发现是要升级到计费账户,也就是需要国外注册地的 Google 账号,同时你要使用到境外的信用卡才能订阅。

这一步就走不通。选择用了第三方的API接口,我使用的是 https://kie.ai/zh-CN ,一个中国人做的,包含了很多大模型的接口(Chatgpt、VEO3、midjourney、Runway、flux kontext……)最便捷的还是付款方式非常方便,支持支付宝…..

这是 Nano banana api 接口信息:https://kie.ai/nano-banana?model=google%2Fnano-banana-edit

它包含三个类型:生图模型、编辑模型、高质量模型,也就是说完成从生图需求到编辑图像需求,再到高质量图像的需求你需要接入这三个API的配置信息。

还有一个注意的地方,我使用的调用方式是 Query Task(Get),使用 Create Task(post)会遇到 404 问题。总的来说接入还算比较顺滑。

3、国产编程模型使用感受

使用过 Trae、Curse-Claude对比 Qoder 我觉得是体验感受是这样的,Curse-Claude > Qoder > Trae。我的命令请求都不是站在程序员角度发出的,这对大模型的中文的理解能力也有一定的挑战,我认为使用 Curse claude调试 bug 是最省心的,我用它来开发 iOS 应用程序,Trae 每次修 bug 都会说修正好了(实际上并没有),平均时间要花费3天。同样的问题,同样的提问请求下 Curse-Claude 能在1天就修完所有Bug。

Qoder 使用下来对文本理解能力很强,能够主动通过测试监控结果找到 bug,这点做的很赞。但是在每次调试 bug 过程中,总会请求不同的端口测试,上下文关联较弱。即使说清楚指定一个端口测试依然会在后续多轮测试中忘记,有待加强。附上我对它狂哄的交流记录:

就到这里,还有很多功能和 bug 需要修复。

我觉得正因为有了 Nano-banana、即梦 这类模型精准的修改能力,出错也越来越少。非常适合在游戏美术团队中使用,特别是前期的新项目筹备需要大量试错,尝试不同的风格。基于这个场景下通过 N8N.io 这类自动化工具接入 Nano-banana-API,并给场景原画、角色立绘、道具设计、图标设计等等进行一些批量生成的定制化工作流。甚至编写不同的需求信息,一并交给Agent 进行排序生成管理,设定命令触发时间,通过视觉大模型检阅生成效果,不满足要求继续触发生成,而设计师只需要在第二天打开云盘审核筛选,优化生成命令,这将会是一个游戏视觉设计师与AI新的协作方式。

二次元fluxlora模型分享-建议搭配union-controlnet-v2使用最佳

这个模型基于flux-dev版模型训练的lora,具备很好的泛化能力。二次元风格,这个模型可以结合线稿、参考姿势结合union-controlnet-v2模型一起使用,能够很好的控制造型姿势。

controlnet-v2工作流

图1是参考图,图3是结合姿势生成的效果。

下面两张图是完全通过参考姿势,完全由模型生成的效果,最终在ps中进行合成构图。

训练参数

最大训练24轮,打标采用触发词和tag组合,素材分为场景图和单人角色效果,拆分训练

下图为文生图效果:

以下是lora通过controlnet-v2 一起使用的流程效果,包括最终修复的效果。

通过网盘分享的文件:

模型触发词:yifanjie_girl,后续接自然文本描述 lora模型权重建议在0.7-0.9之间

链接: https://pan.baidu.com/s/1PQi21XKcrFCvjroZoJXSTQ?pwd=3f54 提取码: 3f54

配套的union-controlnet-v2工作流:https://huggingface.co/Shakker-Labs/FLUX.1-dev-ControlNet-Union-Pro-2.0

分享手动安装搭建Flux-GYM训练工具

哎,其实我更希望分享一些高级一些的东西。天天整这些也不是个事,但是为了能够搭建本地训练环境还是咬着牙踩这个坑。

言归正传,说下基本的配置要求,这个工具要求python版本要在10-12之间,你可别装13的python版本,因为后续会给你安装依赖库带来报错,查来查去最终是因为13版本并不匹配。

另外先安装好Microsoft visual tool生成工具,Visual Studio 2022 版本最好,并且安装完成勾选C++ 桌面开发

再其次,一定要安装nump 1.26.0的版本,2.0以上依赖库会出现冲突。安装node-v20.14.0-x64,安装Rust。这些都是在安装过程中需要对依赖进行编译才能成功安装的基础工具。

对了,Microsoft visual tool C++ 编译器安装成功一定要在环境变量中加入path,set PATH=%PATH%;C:\Program Files (x86)\Microsoft Visual Studio\2019\BuildTools\VC\Tools\MSVC\14.29.30133\bin\Hostx64\x64

可以根据14.29.30133改成你自己安装的版本,以上命令在CMD中运行可加入(强烈建议手动添加)。

以上基础工具安装完成,再根据github中的要求按步骤进行安装。

克隆项目到本地,再从创建python的venv虚拟目录创建,激活并安装依赖都是正常的,我在sd-scripts安装依赖到flux-gym根目录下安装依赖都正常。

最后一步,唯独在这一段:pip install –pre torch torchvision torchaudio –index-url https://download.pytorch.org/whl/cu121

命令安装 2.5.1+cu121出现报错。为啥呢?因为requirements中并没有将这个包:optimum-quanto 指定安装版本,因为optimum-quanto要求 torch>=2.6.0,但系统安装的版本是 2.5.1+cu121

对此那就将optimum-quanto指定下版本, pip install optimum-quanto==0.2.6

最终安装完成,折腾了我3个小时。真是感谢作者吼。

以上,希望在遇到同样问题的人能够提供帮助。

分享一个不全面不客观的flux-train训练工具测评

黑森林团队出的flux模型因其强大的参数,惊艳的细节效果广受欢迎,现在已经在各类AIGC平台占有很大的曝光量,甚至现在libulibu首页也是主推f1.0的lora模型,因其少量数据的微调就能获得很好的效果受到很多人的喜欢。

因为职业关系,我在工作上也尝试了flux-lora模型训练,接下来我分享pinokio-flux-gym训练工具和flux train-aitoolkit 两种工具的差别。

pinokio-fluxgym

优点:安装简单,易上手

缺点:只能训练flux-lora模型,如果想要训练sd1.5和XL模型你需要在社区中找到Kohya训练工具

Pinokio是一个AI社区浏览器,它整合了很多AI工具及工作流。它的优势在于即使你是一个不懂编程语言的小白也能轻松配置好flux lora 的训练环境,安装好pinokio工具之后,直接在探索中找到fluxgym,即可一键安装,其中python环境、第三方依赖性、模型配置等等你完全不需要自行考虑。坐等它配置好就行。

它底层基于Kohya Scripts开发,所有的参数设置都是统一的。在前端界面上采用三分法的布局设计,简化了操作步骤,123的布局设计让人一目了然,降低的理解门槛。在刚开始阶段,你都不需要详细了解具体的参数设置,只管提供优质的训练集就能拿到很好的模型效果,点赞。

实时的训练预览效果,它提供多种不同的预览图触发效果:

1.否定提示词

2.指定生成图像的宽度和宽度

3.指定生成图像的种子

4.指定生成图像的CFG比例

5.指定生成中的步骤数

支持显卡显存12G、16G、20G以上

支持的底模:flux-dev、flux schnell、flux-dev2pro(实际上训练最好用flux-dev1.0、flux-dev2pro)

FluxGYM可以修改训练集的数量 app.py文件,将 MAX_IMAGES = 修改即可

import os
import sys
os.environ["HF_HUB_ENABLE_HF_TRANSFER"] = "1"
os.environ['GRADIO_ANALYTICS_ENABLED'] = '0'
sys.path.insert(0, os.getcwd())
sys.path.append(os.path.join(os.path.dirname(__file__), 'sd-scripts'))
import subprocess
import gradio as gr
from PIL import Image
import torch
import uuid
import shutil
import json
import yaml
from slugify import slugify
from transformers import AutoProcessor, AutoModelForCausalLM
from gradio_logsview import LogsView, LogsViewRunner
from huggingface_hub import hf_hub_download, HfApi
from library import flux_train_utils, huggingface_util
from argparse import Namespace
import train_network
import toml
import re
MAX_IMAGES = 650 //修改训练集数量

flux train-aitoolkit

优点:远程训练, 面向专业级玩家、专业的UI界面

缺点:不稳定,需要简单的代码阅读能力,要配合ChatGpt或者deepseek使用

flux train-aitoolkit 目前处在一个早期版本,意味着在稳定性、功能可能不是那么的好用,该工具并非基于Kohya Scripts开发,其目录结构也和我见到的不同,因为自己对这块认识不够专业性,不便多说。

它最大的特点是基于huggingface远程访问的方式训练模型,这意味着你需要使用huggingface账户,从huggingface获取一个READ密钥,方可进行训练。

它支持FLUX.1-schnell、Flux-dev两个版本的模型训练,因为需要在本地预先写好模型配置信息,所以你需要一定的耐心来配置远程访问的信息。说实话,笔者在github上安装完这个工具都头大,你需要有一定的耐心和好奇心。否则很容易劝退。

Screenshot

笔者在配置以上两个工具都遇到diffusers无法正常克隆的情况,所以你在配置这两个工具都要开启全局git代理,否则很大几率会克隆不成功报错。

如果依然报错请使用国内镜像:https://gitee.com/opensource-customization/diffusers

训练打标

flux的特性是基于自然语言描述打标,所以你在训练中请使用触发词和自然语言描述打标,这样在训练中能够得到很好的效果。这意味着你需要使用GPT、caption等模型工作流来处理你的训练集。笔者实际尝试过仅用tag来打标,发现训练效果并不好(基于秋叶lora-script)。

分辨率

flux对尺寸分辨率没有特殊要求,小到512、大到1024,768*1024也是可以的。

实际跑图

实际使用上,权重同样是0.7-0.9之间最好,并且是触发词加自然语言描述,你的描述越多,生成的效果越细节。这也意味着你在使用上需要对画面更具体的要求,甚至在想法没有那么具体的情况下需要借助deepseek这类工具给你提供帮助。

[转载]Understanding Flux LoRA Training Parameters-了解Flux LoRA训练参数

这是转载自cvitai的文章,作者分享了基于flux lora训练的参数在训练中对模型生成结果的影响表现,值得学习。原文地址:https://civitai.com/articles/11394/understanding-lora-training-parameters

Abstract  摘要

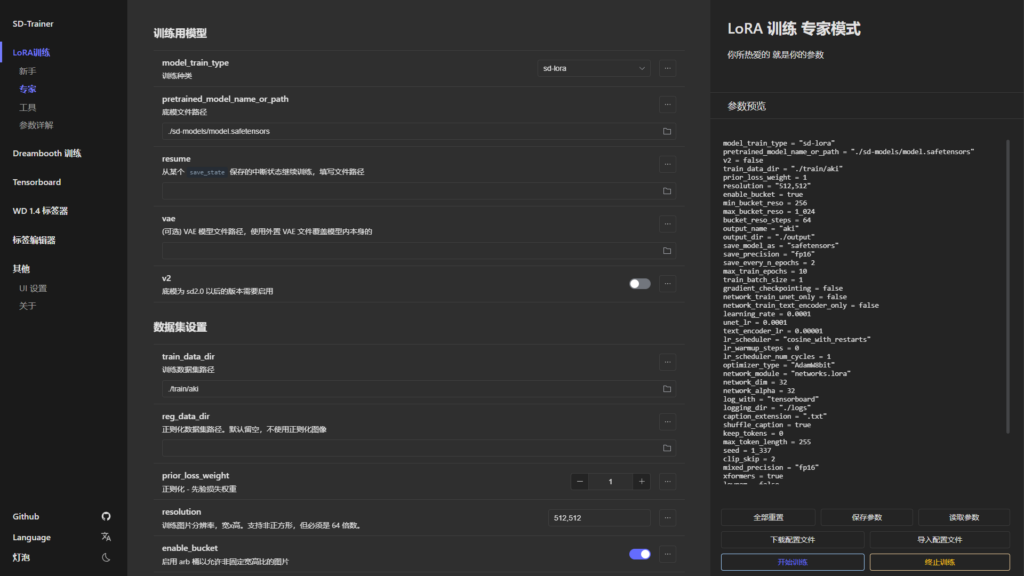
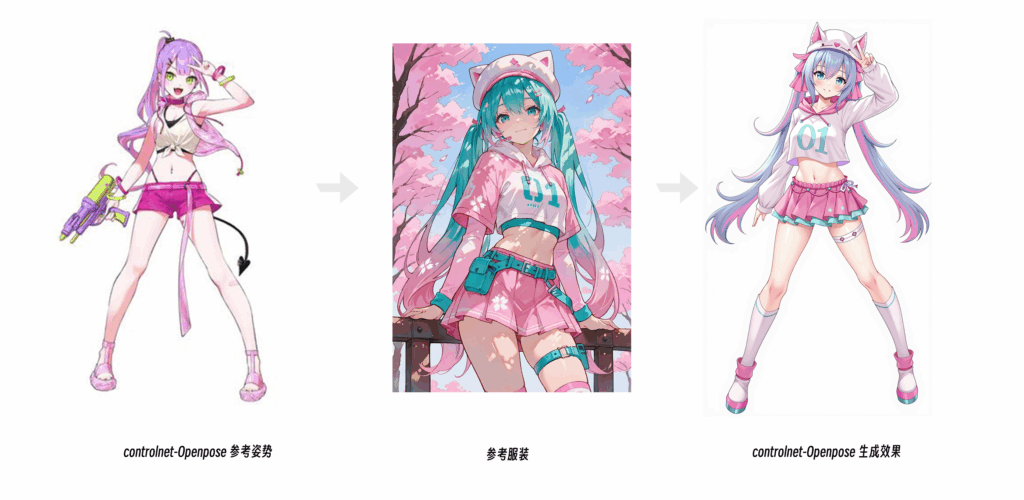
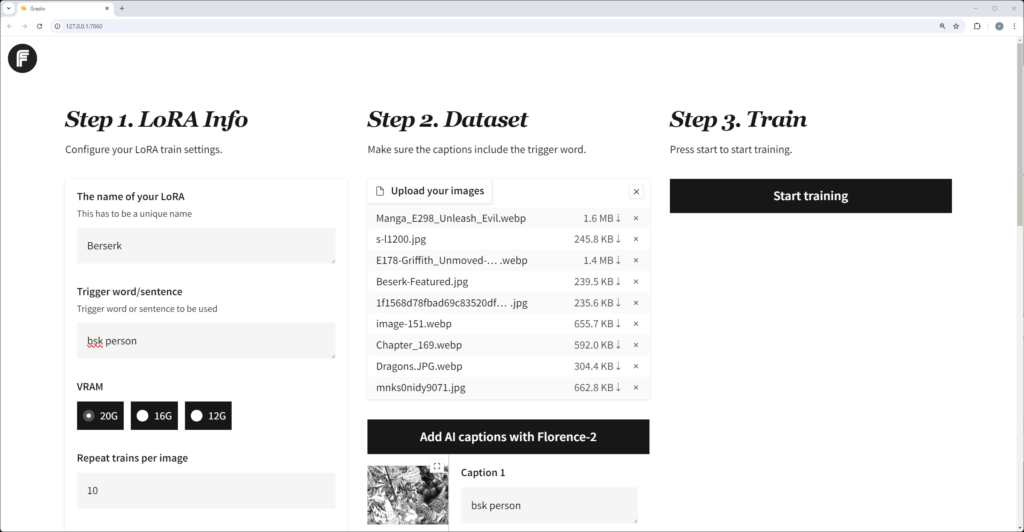
The intent of generating images for my purposes is always central to creating a feeling; however, using machine learning to create images presents the problem of control. Image outputs can be random, incoherent, and difficult to fine-tune for small textural renditions. Feeling and aesthetics are related; to be able to create a feeling with intent, the aesthetic has to be controllable. There are ways to control aesthetics with prompting, custom nodes, and sampling settings, but the most effective approach starts near the beginning of the model pipeline—with custom-trained LoRAs. When training a LoRA, I encounter a long list of complex ML terminology that only registers as abstract concepts within my camera-based foundational understanding of image creation. This research is conducted to help myself and the open-source community define and visualize the effects these parameters have on imagery.


为我的目的生成图像的意图始终是创造感觉的核心;然而,使用机器学习来创建图像存在控制问题。图像输出可能是随机的、不连贯的,并且难以对小纹理再现进行微调。感觉和美学是相关的;为了能够创造一种有意图的感觉,美学必须是可控的。有很多方法可以通过提示、自定义节点和采样设置来控制美观性,但最有效的方法是从模型管道的开始处开始-使用自定义训练的LoRA。在训练LoRA时,我遇到了一长串复杂的ML术语,这些术语在我基于相机的图像创建基础理解中仅被视为抽象概念。进行这项研究是为了帮助我自己和开源社区定义和可视化这些参数对图像的影响。

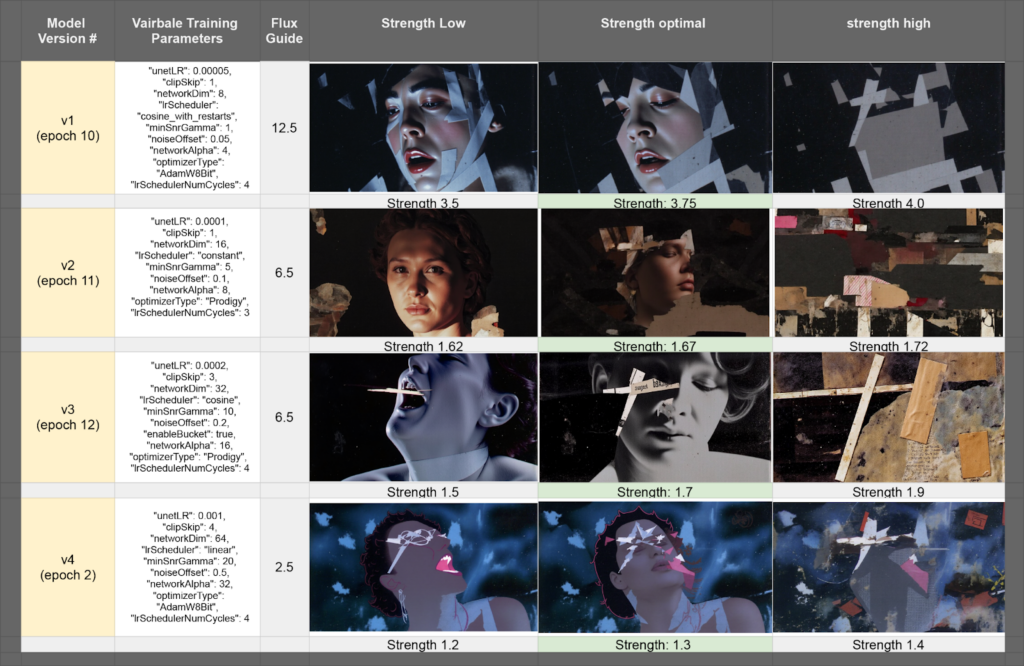
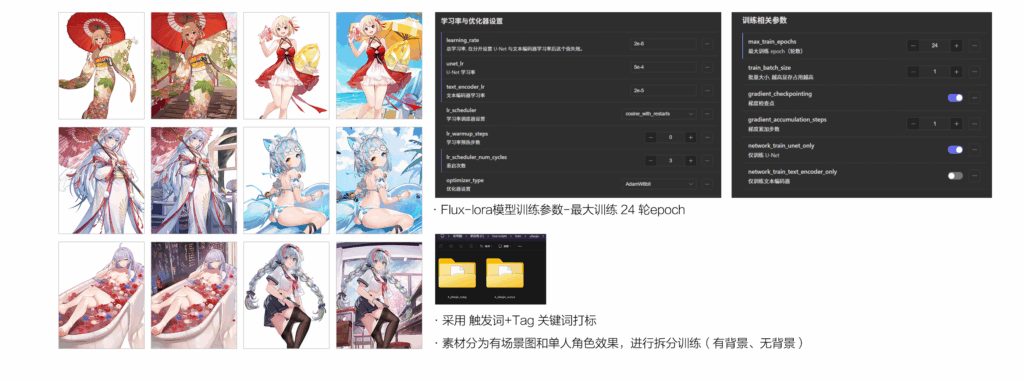
I created a dataset of 30 images generated by Kurt Schwitters, an early 1900s Dadaism artist, intending to synthesize his noninformative collage style into controlled imagery with formative subject matter. I trained four different LoRAs, each with a different combination of parameters at extreme variations, to compare the results. Because the training data is all abstract collage and I want to merge the style with defined forms, I labeled all of the training data with false captions, covering a range of scene descriptions. The training data is available here.
我创建了一个由20世纪初达达主义艺术家库尔特·施维特斯(Kurt Schwitters)生成的30幅图像的数据集,打算将他的非信息拼贴风格合成为具有形成主题的受控图像。我训练了四个不同的LoRA,每个LoRA在极端变化下具有不同的参数组合,以比较结果。因为训练数据都是抽象的拼贴画,我想将样式与定义的形式合并,所以我用假标题标记了所有训练数据,覆盖了一系列场景描述。训练数据可在此处获取。

1.1 Parameters tested  验证参数

Unet Learning Rate  Unet学习率

Clip Skip  剪辑跳过

Network Dimension  网络维度

Learning Rate Scheduler   学习率

Min SNR Gamma  最小SNR Gamma

Noise Offset  噪声偏移

Optimizer  优化器

Network Alpha   网络α

Learning Rate Scheduler Number Cycle 
学习率数字周期

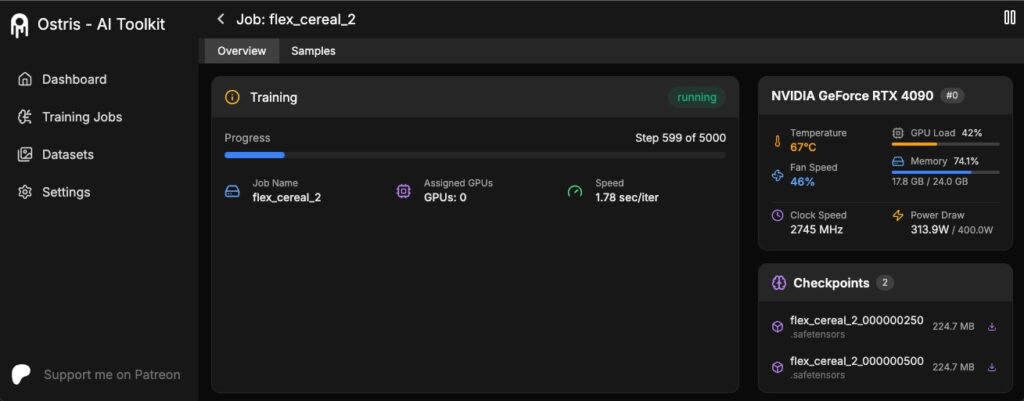
2. Experimental Setup 验证维度

Dataset: 30 images, each trained under four LoRA versions with variations in key parameters.
数据集:30张图像,每张图像在四个LoRA版本下训练,关键参数不同。

Evaluation Criteria:  评价标准:

Text/Prompt Integrity (how well text is preserved in output)
文本/提示完整性(文本在输出中的保存情况)

Overall LoRA Strength (extent of stylization and fidelity changes)
总体LoRA强度(风格化程度和保真度变化)

Artifact Frequency (presence of visual noise, distortions)
频率(存在视觉噪声、失真)

Realism vs. Cartoon Aesthetic (balance of photorealism and abstraction)
现实主义与卡通美学(摄影现实主义和抽象的平衡)

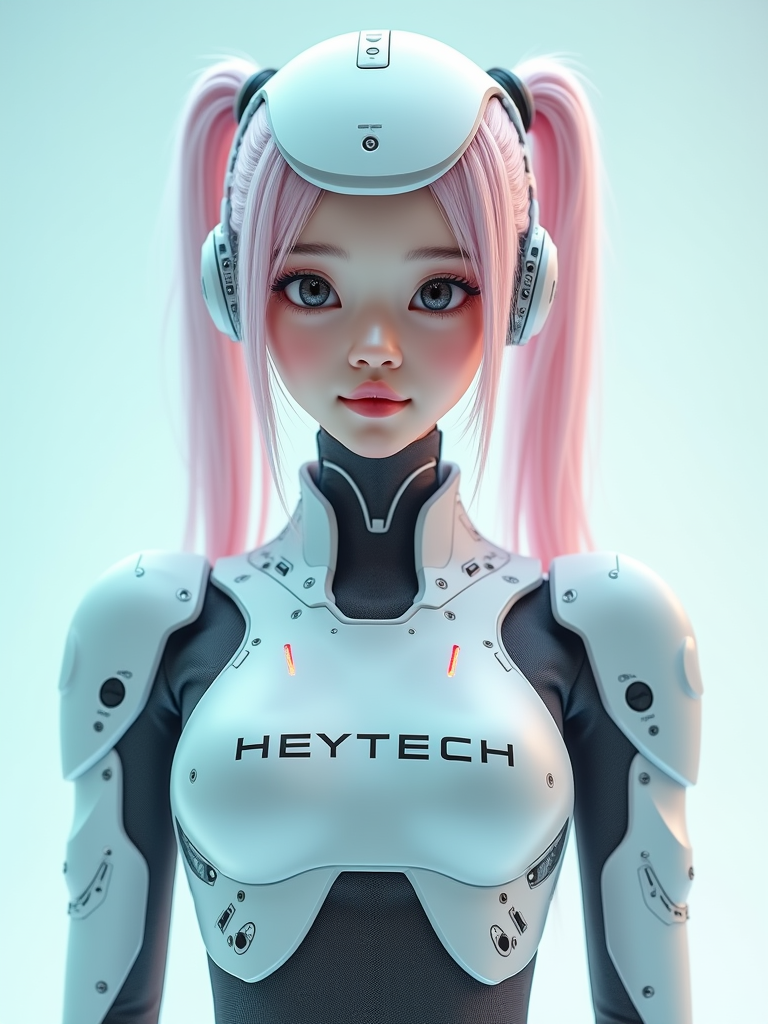
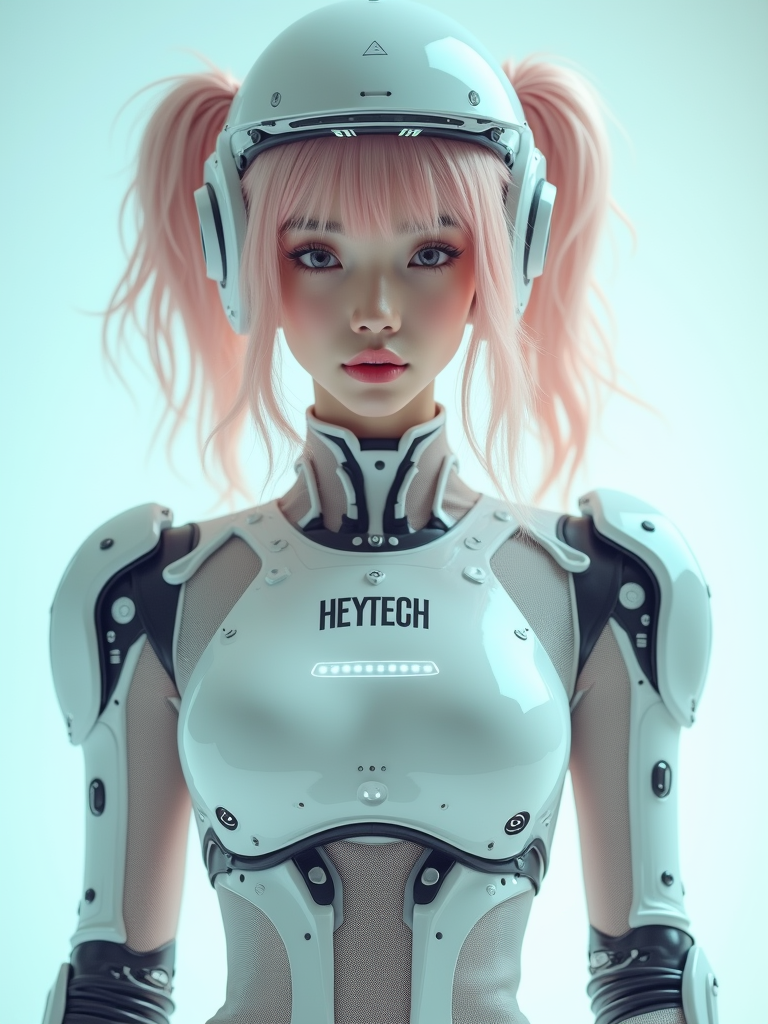
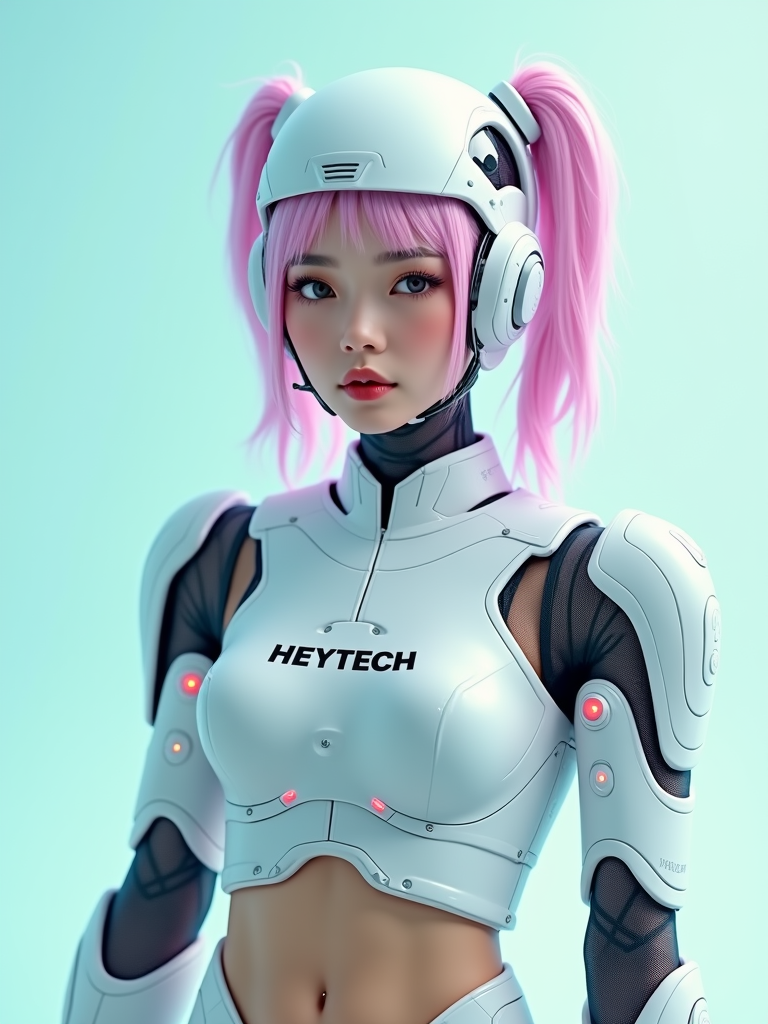
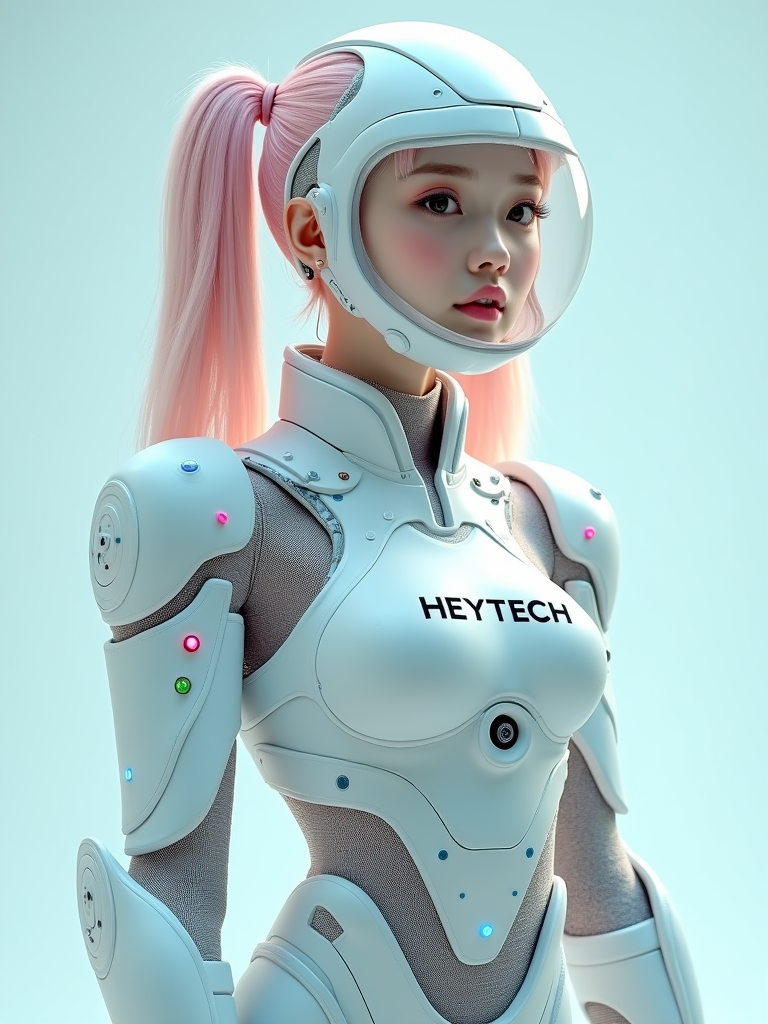
Seed Consistency (output stability across multiple various seeds *sample images below all have the same seed)
种子一致性(多个不同种子的输出稳定性 * 下面的示例图像都具有相同的种子)

3. Results 结果

3.1 Results with trained Loras 经过训练的Loras的结果

3.2 Results with no Loras (base model only) 无Loras的结果(仅基础模型)

4 Findings & Parameter Effects 结果和参数影响

4.1 Unet Learning Rate  Unet学习率

Higher Unet LR values (0.0002–0.001) significantly increase stylization, often leading to texture destruction and less controlled details. Lower Unet LR values (0.00005–0.0001) keep outputs more subtle, maintaining finer details but requiring higher LoRA strength to have a noticeable impact.
较高的Unet LR值(0.0002-0.001)会显著增加风格化,通常会导致纹理破坏和较少的控制细节。较低的Unet LR值(0.00005-0.0001)使输出更加精细,保持更精细的细节,但需要更高的LoRA强度才能产生明显的影响。

4.2 Clip Skip  剪辑跳过

Higher Clip Skip values (3–4) remove the influence of text guidance almost entirely, instead prioritizing textures, color balance, and stylization. Lower values (1–2) preserve typography and finer print details, making them more effective for text-heavy generations.
较高的“剪辑跳过”值(3-4)几乎完全消除了文本指导的影响,而不是优先考虑纹理、颜色平衡和样式化。较低的值(1-2)保留排版和更精细的打印细节,使其对文本密集的生成更有效。

4.3 Network Dimension  4.3网络维度

Lower Network Dimension values (8–16) make LoRAs effective only at high strengths, requiring exaggerated weight application to be noticeable. Higher Network Dimension values (32–64) produce more aggressive LoRA effects, often necessitating lower strengths to avoid excessive influence over outputs.
较低的网络尺寸值(8-16)使LoRA仅在高强度下有效,需要夸大的重量应用才能引起注意。较高的网络维度值(32-64)会产生更积极的LoRA效应,通常需要较低的强度来避免对输出产生过度影响。

4.4 Learning Rate Schedulers 学习率调度器

“Cosine with restarts” introduces drastic jumps in effect at strength thresholds, making it useful for controlled variability. “Constant” keeps training stable but with limited flexibility in adaptation. “Cosine” tends to enhance 3D-like structures but results in unstable outputs across different seeds. “Linear” smooths out color transitions but can overly flatten contrast-heavy images.
“重启余弦”在强度阈值处引入了剧烈的跳跃,使其对受控的可变性很有用。“恒定”可保持训练稳定,但适应灵活性有限。“余弦”倾向于增强3D类结构,但导致不同种子的输出不稳定。“线性”平滑了颜色过渡,但可能会过度平坦化对比度高的图像。

4.5 Min SNR Gamma  最小SNR Gamma

Higher Min SNR Gamma values (10–20) enhance contrast and sharpness but tend to flatten color depth, reducing natural shading. Lower values (5) retain softer gradients and allow for more depth in complex lighting conditions.
较高的最小信噪比伽玛值(10-20)可增强对比度和锐度,但会使颜色深度变平,从而减少自然着色。较低的值(5)保留较柔和的渐变,并允许在复杂的照明条件下获得更大的深度。

4.6 Noise Offset  噪声偏移

Higher Noise Offset values (0.3–0.5) introduce grain and chaos, mimicking VHS/Polaroid textures and adding analog-style imperfections. Lower values (0.05–0.1) preserve clarity and retain finer textures without unwanted distortions.
较高的“噪波偏移”值(0.3-0.5)会引入颗粒和混乱,模仿VHS/Polaroid纹理并添加模拟风格的瑕疵。较低的值(0.05-0.1)可保持清晰度并保留较精细的纹理,而不会出现不必要的扭曲。

4.7 Network Alpha  网络α

Higher Network Alpha values (16–32) amplify LoRA influence even at low strengths, often overpowering realism with more aggressive stylistic imprints. Lower values (4–8) require higher LoRA strengths to manifest noticeable effects but maintain a more subtle impact on realism.
较高的网络Alpha值(16-32)即使在低强度下也会放大LoRA的影响力,通常会以更具侵略性的风格印记压倒现实主义。较低的值(4-8)需要较高的LoRA强度来表现出明显的效果,但对真实感的影响更微妙。

4.8 Optimizers 

AdamW8Bit provides predictable, controlled results, making it ideal for structured LoRA applications. Prodigy forces stronger stylization effects, leading to more chaotic analog textures and unpredictable outputs.
AdamW8Bit提供可预测、可控的结果,是结构化LoRA应用的理想选择。Prodigy强制更强的风格化效果,导致更混乱的模拟纹理和不可预测的输出。

4.9 Learning Rate Scheduler Number Cycles 学习率循环次数

Higher LR Scheduler cycles introduce extreme variation between epochs, allowing for more diverse stylistic shifts throughout training. Lower cycle values maintain a more consistent stylization across training steps.
更高的LR训练周期在不同时期之间引入了极端的变化,允许在整个训练过程中进行更多样化的风格转换。较低的循环值在训练步骤中保持更一致的风格化。

5. Practical Applications of Parameters 参数的实际应用

5.1 Artifacts & Clarity  人工制品和清晰度

Higher Noise Offset values increase grain, texture, and chaotic variation. Min SNR Gamma improves clarity and sharpness in outputs. Higher Clip Skip values can reduce artifacts but may also lower overall clarity.
较高的“噪波偏移”值会增加颗粒、纹理和混乱变化。最小SNR Gamma可提高输出的清晰度和锐度。较高的“剪辑跳过”值可以减少瑕疵,但也可能降低整体清晰度。

5.2 Realism vs. Cartoon Spectrum Shift 现实主义vs.卡通光谱转移

Higher Clip Skip values push results toward photorealism, while lower values make images more stylized and painterly. Higher Unet LR values soften outputs with artistic distortions. Lower Noise Offset values produce cleaner images, while higher values introduce a gritty, film-like look.
较高的“剪辑跳过”值会使结果更接近照片级真实感,而较低的值会使图像更具有风格化和绘画感。较高的Unet LR值会软化带有艺术失真的输出。较低的“噪波偏移”值会产生更清晰的图像,而较高的值会产生粗糙的胶片外观。

5.3 Seed Consistency & Unpredictability 种子一致性和不可预测性

“Cosine with restarts” LR Scheduler creates controlled unpredictability across generations. The Prodigy optimizer decreases consistency, increasing variation in outputs. Higher Unet LR values decrease seed consistency, leading to less predictable outputs. Lower Network Alpha values stabilize seed predictability by reducing LoRA dominance.
“重启余弦”LR迭代法创造了跨代的可控不可预测性。Prodigy优化器降低了一致性,增加了输出的变化。更高的Unet LR值会降低种子一致性,导致更不可预测的输出。较低的网络Alpha值通过降低LoRA优势来稳定种子的可预测性。

5.4 Overfitting vs. Generalization 过度拟合与泛化

Higher Network Dimension values encourage overfitting, reducing flexibility in LoRA adaptation. Higher Unet LR values can cause over-memorization, leading to less variability. Higher Clip Skip values can improve generalization, allowing models to extract broader stylistic features rather than overfitting to specifics.
更高的网络维度值会鼓励过度拟合,降低LoRA适应的灵活性。较高的Unet LR值可能会导致记忆过度,从而导致可变性降低。较高的“剪辑跳过”值可以改善泛化,允许模型提取更广泛的风格特征,而不是过度拟合细节。

5.5 Parameter Sensitivity (How Small Changes Impact Outputs) 参数敏感度(微小变化如何影响输出)

Higher Network Alpha values result in small adjustments causing large output shifts. Higher Min SNR Gamma stabilizes changes, making variations less extreme. Higher Noise Offset values increase chaotic elements, making outputs more sensitive to small adjustments.
较高的网络Alpha值会导致小的调整,从而导致大的输出偏移。较高的Min SNR Gamma可稳定变化,使变化不那么极端。较高的“噪波偏移”值会增加混乱元素,使输出对微小调整更加敏感。

5.6 Fine Detail Retention 精细细节保留

Higher Min SNR Gamma values improve fine detail preservation. Excessively high Network Dimension values can cause loss of finer details. Lower Unet LR values help maintain sharpness and structural integrity.
较高的Min SNR Gamma值可改善精细细节保留。过高的网络尺寸值可能会导致丢失更精细的细节。较低的Unet LR值有助于保持清晰度和结构完整性。

5.7 Contrast & Tonal Shifts 对比度和色调变化

Higher Noise Offset values wash out tonal depth and flatten colors. Higher Min SNR Gamma values create stronger contrast, deepening shadows and enhancing highlights. The Prodigy optimizer produces harsher, more exaggerated contrast shifts.
较高的“噪波偏移”值会冲淡色调深度并使颜色变平。较高的最小SNR Gamma值可创建更强的对比度,加深阴影并增强高光。Prodigy优化器产生更严厉,更夸张的对比度变化。

5.8 Stylization vs. Photorealism 风格化与照相现实主义

Higher Clip Skip values push toward photorealism, while lower values lean into stylization. Higher Network Dimension values increase stylistic influence and exaggeration. Higher Unet LR values soften images, creating a more dreamlike, impressionistic aesthetic.
较高的“剪辑跳过”值会推动照片现实主义,而较低的值则倾向于风格化。较高的“网络尺寸”值会增加风格影响和夸张效果。更高的Unet LR值可以软化图像,创造出更梦幻、更印象派的美感。

6. Conclusion 结论

Fine-tuning individual values such as Clip Skip, Unet LR, and Noise Offset enables targeted control over stylization, realism, and text fidelity. Future studies will expand on testing parameters individually, multi-LoRA blending, and dataset balancing.
微调各个值(如“剪辑跳过”、“Unet LR”和“噪波偏移”)可实现对样式化、真实感和文本保真度的目标控制。未来的研究将扩展单独测试参数,多LoRA混合和数据集平衡。

关于SD-FLUX-AIGC的模型训练工具的使用感受

今天来说说我所接触的这四个训练工具,目前来说稳定性比较好,受到广大群众认可的训练工具。其核心都是采用的kohya-ss底层。我之所以推荐这四个其实基本上考虑到易用性,对新手是友好的。

硬件要求:最起码16G的显存起步,如果没有最好是用线上训练平台来做。时间效率会高很多。kohya本身是本地部署的,包括秋叶训练工具。如果要从易用性上考虑还是推荐用秋叶训练包,界面友好、文本解释性的内容直观,能够消除新手入门的很多疑惑。

kohya也是有GUI界面的,使用的是gradio的框架,和stable diffusion界面一致。但是,如果对训练原理不太懂其实并不推荐,这会让你因为各种参数,报错给折腾的无从下手。

kohya-ss 地址:https://github.com/kohya-ss/sd-scripts/tree/sd3

秋叶训练 整合包项目地址 https://github.com/Akegarasu/lora-scripts

Civitai 模型训练平台 地址:https://civitai.com/models/train

算力需要收费,5美元5000个Buzz(也就是显卡算力),相比liblib稍微便宜一点昂。个人比较推荐的训练平台。支持多个任务同时进行,支持最新flux模型lora训练。价格比较便宜,数量集最大支持1000的限制。

交互设计上采用分阶段提交的方式,各个参数说明都挺详细,训练过程如下:

civitai flux 模型训练界面

实际训练体验

如果你是仅训练单一风格素材(例如单一人像风格,单一属性元素的图标等等)并且训练集的数量较少可以选择这个服务。否则你的训练集过多会因为总步数的限制导致训练效果不佳。后台给你的总步数是10000步,超出这个数系统不会执行。

liblib 训练 地址:https://www.liblib.art/pretrain

liblib 模型训练界面

他们的界面简化了训练参数,如果需要专业参数可以点开设置。

哩布哩布的话是生成会员+训练会员制度,如果你是有训练需求的话只需要购买训练会员就可以了,一般训练300训练集以上要充值199元,59元是一个基础的模型训练仅支持200张训练集

实际效果如何可以访问这个地址:Flux-日韩二次元 写实 游戏图标模型

基于flux1模型训练的lora,实际使用请看详细说明。

记录我在尝试使用Flux换脸工作流遇到的问题

这个问题搞到最后把我自己逗乐了,我暂且还原下我在配置这个工作流环境遇到的问题。

这个工作流来自civitai 老外分享的一个换脸工作流,我将其导入本地comfyui之后照常安装缺失节点,包括如下部分:

怎么会这么多节点要安装? 首先我导入这个工作流默认只提示缺失三个节点,GGUF和everywhere以及reactor这些。

安装好重启出现如下报错:

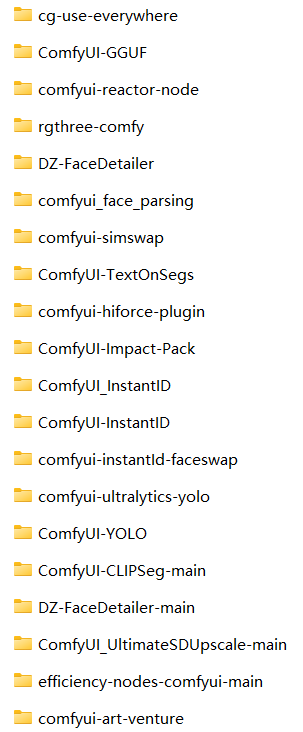
During handling of the above exception, another exception occurred:

Traceback (most recent call last):
  File "D:\ComfyUI-aki\ComfyUI-aki-v1.3\nodes.py", line 1993, in load_custom_node
    module_spec.loader.exec_module(module)
  File "<frozen importlib._bootstrap_external>", line 883, in exec_module
  File "<frozen importlib._bootstrap>", line 241, in _call_with_frames_removed
  File "D:\ComfyUI-aki\ComfyUI-aki-v1.3\custom_nodes\comfyui_face_parsing\__init__.py", line 18, in <module>
    download_url("https://huggingface.co/jonathandinu/face-parsing/resolve/main/config.json?download=true", face_parsing_path, "config.json")
  File "D:\ComfyUI-aki\ComfyUI-aki-v1.3\python\lib\site-packages\torchvision\datasets\utils.py", line 134, in download_url
    url = _get_redirect_url(url, max_hops=max_redirect_hops)
  File "D:\ComfyUI-aki\ComfyUI-aki-v1.3\python\lib\site-packages\torchvision\datasets\utils.py", line 82, in _get_redirect_url
    with urllib.request.urlopen(urllib.request.Request(url, headers=headers)) as response:
  File "D:\ComfyUI-aki\ComfyUI-aki-v1.3\python\lib\urllib\request.py", line 216, in urlopen
    return opener.open(url, data, timeout)
  File "D:\ComfyUI-aki\ComfyUI-aki-v1.3\python\lib\urllib\request.py", line 519, in open
    response = self._open(req, data)
  File "D:\ComfyUI-aki\ComfyUI-aki-v1.3\python\lib\urllib\request.py", line 536, in _open
    result = self._call_chain(self.handle_open, protocol, protocol +
  File "D:\ComfyUI-aki\ComfyUI-aki-v1.3\python\lib\urllib\request.py", line 496, in _call_chain
    result = func(*args)
  File "D:\ComfyUI-aki\ComfyUI-aki-v1.3\python\lib\urllib\request.py", line 1391, in https_open
    return self.do_open(http.client.HTTPSConnection, req,
  File "D:\ComfyUI-aki\ComfyUI-aki-v1.3\python\lib\urllib\request.py", line 1351, in do_open
    raise URLError(err)
urllib.error.URLError: <urlopen error [WinError 10060] 由于连接方在一段时间后没有正确答复或连接的主机没有反应,连接尝试失败。>

Cannot import D:\ComfyUI-aki\ComfyUI-aki-v1.3\custom_nodes\comfyui_face_parsing module for custom nodes: <urlopen error [WinError 10060] 由于连接方在一段时间后没有正确答复或连接的主机没有反应,连接尝试失败。>
FizzleDorf Custom Nodes: Loaded
FaceDetailer: Model directory already exists
FaceDetailer: Model doesnt exist
FaceDetailer: Downloading model

说明face_parsing节点是安装了,但是facedetailer依赖的模型下载失败,GPT指引我去这个插件文件夹下找到nodes.py 文件,看它需要下载哪些模型,以及模型的下载地址都是哪些,代码如下:

ef get_restorers():
    models_path = os.path.join(models_dir, "facerestore_models/*")
    models = glob.glob(models_path)
    models = [x for x in models if (x.endswith(".pth") or x.endswith(".onnx"))]
    if len(models) == 0:
        fr_urls = [
            "https://huggingface.co/datasets/Gourieff/ReActor/resolve/main/models/facerestore_models/GFPGANv1.3.pth",
            "https://huggingface.co/datasets/Gourieff/ReActor/resolve/main/models/facerestore_models/GFPGANv1.4.pth",
            "https://huggingface.co/datasets/Gourieff/ReActor/resolve/main/models/facerestore_models/codeformer-v0.1.0.pth",
            "https://huggingface.co/datasets/Gourieff/ReActor/resolve/main/models/facerestore_models/GPEN-BFR-512.onnx",
            "https://huggingface.co/datasets/Gourieff/ReActor/resolve/main/models/facerestore_models/GPEN-BFR-1024.onnx",
            "https://huggingface.co/datasets/Gourieff/ReActor/resolve/main/models/facerestore_models/GPEN-BFR-2048.onnx",
        ]
        for model_url in fr_urls:
            model_name = os.path.basename(model_url)
            model_path = os.path.join(dir_facerestore_models, model_name)
            download(model_url, model_path, model_name)
        models = glob.glob(models_path)
        models = [x for x in models if (x.endswith(".pth") or x.endswith(".onnx"))]
    return models

好家伙,地址都对,也能手动下载模型放到models/facerestore_models即可。但是偏偏后台下载提示无响应。手动下载重启节点后问题消失。

之后重磅的来了,提示找不到 AV_Facedetailer 节点,这就让我很纳闷折腾了2个小时,为什么呢?谷歌找不到一个唯一匹配的答案是这个 但偏偏又没有下载链接,github上空空如也。所以你就知道为啥我第一张图拉了一个那么长的清单安装的节点了吧?我一直以为是impact-pack 依赖项节点是它,一顿操作下来原地杵。

继续回到civitai去看评论,果然大家都遇到这个问题。

如图:

 AV_Facedetailer 这个节点命名和art-venture相差也太远了吧! 要没这个大哥发出来天王老子都找不到这个节点啊。事实上3个多小时,总算把这个流程顺利安装好了。

嗯,如果有遇到类似的朋友,记得看评论,记得看说明书,太操蛋了。 先做个记录,换脸效果后续补上,因为我发现GGUF这个节点需要依赖预训练好的模型。

9月28日更新换脸工作流节点的问题:

今天像实际跑一下流程看是否跑通,上传照片之后出现如下报错:

执行 KSampler 时发生错误:cast_to() 得到了一个意外的关键字参数“copy” 文件“D:\ComfyUI-aki\ComfyUI-aki-v1.3\execution.py”, 第 317 行,在执行 output_data, output_ui, has_subgraph = get_output_data(obj, input_data_all, executive_block_cb=execution_block_cb, pre_execute_cb=pre_execute_cb) 文件“D:\ComfyUI-aki\ComfyUI-aki-v1.3\execution.py”, 第 192 行,在 get_output_data return_values = _map_node_over_list(obj, input_data_all, obj.FUNCTION, allow_interrupt=True, executive_block_cb=execution_block_cb, pre_execute_cb=pre_execute_cb) 文件“D:\ComfyUI-aki\ComfyUI-aki-v1.3\execution.py”, 第 169 行, 在 _map_node_over_list process_inputs(input_dict, i) 文件“D:\ComfyUI-aki\ComfyUI-aki-v1.3\execution.py”, 第 158 行, 在 process_inputs results.append(getattr(obj, func)(**inputs)) 文件“D:\ComfyUI-aki\ComfyUI-aki-v1.3\nodes.py”, 第 1429 行, 在 sample return common_ksampler(model, seed, steps, cfg, sampler_name, scheduler, positive, negative, latent_image, denoise=denoise) 文件“D:\ComfyUI-aki\ComfyUI-aki-v1.3\nodes.py”, 第 1396 行, 在 common_ksampler samples = comfy.sample.sample(model, noise, steps, cfg, sampler_name, scheduler, positive, negative, latent_image, File "D:\ComfyUI-aki\ComfyUI-aki-v1.3\custom_nodes\ComfyUI-Impact-Pack\modules\impact\sample_error_enhancer.py", line 9, in informative_sample return original_sample(*args, **kwargs) # 此代码有助于解释异常中发生的错误消息,但不会对其他操作产生任何影响。文件“D:\ComfyUI-aki\ComfyUI-aki-v1.3\custom_nodes\ComfyUI-AnimateDiff-Evolved\animatediff\sampling.py”,第 420 行,在 motion_sample 中返回 orig_comfy_sample(model, noise, *args, **kwargs) 文件“D:\ComfyUI-aki\ComfyUI-aki-v1.3\comfy\sample.py”,第 43 行,在样本中 samples = sampler.sample(noise, positive, negative, cfg=cfg, latent_image=latent_image, start_step=start_step, last_step=last_step, force_full_denoise=force_full_denoise, denoise_mask=noise_mask, sigmas=sigmas, callback=callback, disable_pbar=disable_pbar, seed=seed) 文件“D:\ComfyUI-aki\ComfyUI-aki-v1.3\comfy\samplers.py”, 第 829 行,在样本中返回样本(self.model、noise、positive、negative、cfg、self.device、sampler、sigmas、self.model_options、latent_image=latent_image、denoise_mask=denoise_mask、callback=callback、disable_pbar=disable_pbar、seed=seed)文件“D:\ComfyUI-aki\ComfyUI-aki-v1.3\comfy\samplers.py”, 第 729 行,在样本中返回 cfg_guider.sample(noise、latent_image、sampler、sigmas、denoise_mask、callback、disable_pbar、seed)文件“D:\ComfyUI-aki\ComfyUI-aki-v1.3\comfy\samplers.py”, 第 716 行,在样本中输出 = self.inner_sample(noise, latent_image, device, sampler, sigmas, denoise_mask, callback, disable_pbar, seed) 文件“D:\ComfyUI-aki\ComfyUI-aki-v1.3\comfy\samplers.py”,第 695 行,在 inner_sample 中,samples = sampler.sample(self,sigmas、extra_args、callback、noise、latent_image、denoise_mask、disable_pbar) 文件“D:\ComfyUI-aki\ComfyUI-aki-v1.3\comfy\samplers.py”, 第 600 行, 在样本中 samples = self.sampler_function(model_k、noise、sigmas、extra_args=extra_args、callback=k_callback、disable=disable_pbar、**self.extra_options) 文件“D:\ComfyUI-aki\ComfyUI-aki-v1.3\python\lib\site-packages\torch\utils\_contextlib.py”, 第 115 行, 在 decorate_context return func(*args, **kwargs) 文件“D:\ComfyUI-aki\ComfyUI-aki-v1.3\comfy\k_diffusion\sampling.py”, 第 144 行, 在sample_euler denoised = model(x, sigma_hat * s_in, **extra_args) 文件“D:\ComfyUI-aki\ComfyUI-aki-v1.3\comfy\samplers.py”, 第 299 行, 在 __call__ out = self.inner_model(x, sigma, model_options=model_options, seed=seed) 文件“D:\ComfyUI-aki\ComfyUI-aki-v1.3\comfy\samplers.py”, 第 682 行, 在 __call__ return self.predict_noise(*args, **kwargs) 文件“D:\ComfyUI-aki\ComfyUI-aki-v1.3\comfy\samplers.py”, 第 685 行, 在 predict_noise return samples_function(self.inner_model, x, timestep, self.conds.get("negative", None), self.conds.get("positive", None), self.cfg, model_options=model_options, seed=seed) 文件“D:\ComfyUI-aki\ComfyUI-aki-v1.3\comfy\samplers.py”, 第 279 行, 在 samples_function 中 out = calc_cond_batch(model, conds, x, timestep, model_options) 文件“D:\ComfyUI-aki\ComfyUI-aki-v1.3\comfy\samplers.py”, 第 228 行, 在 calc_cond_batch 中 output = model.apply_model(input_x, timestep_, **c).chunk(batch_chunks) 文件“D:\ComfyUI-aki\ComfyUI-aki-v1.3\comfy\model_base.py”, 第 142 行, 在 apply_model 中 model_output = self.diffusion_model(xc, t, context=context,control=control,transformer_options=transformer_options,**extra_conds).float() 文件“D:\ComfyUI-aki\ComfyUI-aki-v1.3\python\lib\site-packages\torch\nn\modules\module.py”,第 1518 行,在 _wrapped_call_impl 中返回 self._call_impl(*args,**kwargs) 文件“D:\ComfyUI-aki\ComfyUI-aki-v1.3\python\lib\site-packages\torch\nn\modules\module.py”,第 1527 行,在 _call_impl 中返回 forward_call(*args,**kwargs) 文件“D:\ComfyUI-aki\ComfyUI-aki-v1.3\comfy\ldm\flux\model.py”,第 159 行,在 forward out = self.forward_orig(img, img_ids、context、txt_ids、timestep、y、guided、control)文件“D:\ComfyUI-aki\ComfyUI-aki-v1.3\comfy\ldm\flux\model.py”,第 118 行,在 forward_orig img 中,txt = block(img=img, txt=txt, vec=vec, pe=pe) 文件“D:\ComfyUI-aki\ComfyUI-aki-v1.3\python\lib\site-packages\torch\nn\modules\module.py”,第 1518 行,在 _wrapped_call_impl 中返回 self._call_impl(*args, **kwargs) 文件“D:\ComfyUI-aki\ComfyUI-aki-v1.3\python\lib\site-packages\torch\nn\modules\module.py”,第 1527 行,在 _call_impl 中返回forward_call(*args, **kwargs) 文件“D:\ComfyUI-aki\ComfyUI-aki-v1.3\comfy\ldm\flux\layers.py”,第 148 行,向前 img_mod1,img_mod2 = self.img_mod(vec) 文件“D:\ComfyUI-aki\ComfyUI-aki-v1.3\python\lib\site-packages\torch\nn\modules\module.py", 第 1518 行,在 _wrapped_call_impl 中返回 self._call_impl(*args, **kwargs) 文件“D:\ComfyUI-aki\ComfyUI-aki-v1.3\python\lib\site-packages\torch\nn\modules\module.py", 第 1527 行,在 _call_impl 中返回 forward_call(*args, **kwargs) 文件“D:\ComfyUI-aki\ComfyUI-aki-v1.3\comfy\ldm\flux\layers.py", 第 110 行,在 forward out = self.lin(nn. functional.silu(vec))[:, None, :].chunk(self.multiplier, dim=-1) 文件“D:\ComfyUI-aki\ComfyUI-aki-v1.3\python\lib\site-packages\torch\nn\modules\module.py”, 第 1518 行, 在 _wrapped_call_impl 中返回 self._call_impl(*args, **kwargs) 文件 “D:\ComfyUI-aki\ComfyUI-aki-v1.3\python\lib\site-packages\torch\nn\modules\module.py”, 第 1527 行, 在 _call_impl 中返回 forward_call(*args, **kwargs) 文件 “D:\ComfyUI-aki\ComfyUI-aki-v1.3\comfy\ops.py”, 第 67 行, 在 forward 中返回 self.forward_comfy_cast_weights(*args, **kwargs) 文件“D:\ComfyUI-aki\ComfyUI-aki-v1.3\custom_nodes\ComfyUI-GGUF\ops.py”, 第 152 行, 在 forward_comfy_cast_weights 中返回 self.forward_ggml_cast_weights(input, *args, **kwargs) 文件“D:\ComfyUI-aki\ComfyUI-aki-v1.3\custom_nodes\ComfyUI-GGUF\ops.py”, 第 174 行, 在 forward_ggml_cast_weights 中 weight, bias = self.cast_bias_weight(input) 文件“D:\ComfyUI-aki\ComfyUI-aki-v1.3\custom_nodes\ComfyUI-GGUF\ops.py”, 第 144 行, 在 cast_bias_weight 中 bias = comfy.ops.cast_to(bias, bias_dtype, device, non_blocking=non_blocking,复制=False)在 cast_bias_weight bias = comfy.ops.cast_to(bias、bias_dtype、device、non_blocking=non_blocking、copy=False) 中在 cast_bias_weight bias = comfy.ops.cast_to(bias、bias_dtype、device、non_blocking=non_blocking、copy=False) 中

很显然,这个报错出现GGUF和Animatediff插件之间的兼容性问题,我发现本地的Animatediff插件是没有模型依赖的,猜测是没模型导致报错?所以下载了两个模型一个ckpt一个lora,但是没有解决,依然报以上错误。

查询GPT找答案:

将以上报错发过去,补充了如下问题:我看别人反馈这种报错是animatediff插件导致的链接地址:https://github.com/Kosinkadink/ComfyUI-AnimateDiff-Evolved,说什么不是最新版本我升级的都是新版本,依然是这个报错

得到答案:

您遇到的错误cast_to() got an unexpected keyword argument 'copy'确实与 ComfyUI 的最新版本与插件之间的兼容性问题有关AnimateDiff-Evolved

看来根本原因是 ComfyUI 更新与AnimateDiff-Evolved插件不匹配。最新的 ComfyUI 更新引入了某些自定义节点的旧版本不完全支持的更改,包括它们处理参数的方式,例如copy在以下函数中(cast_to()

GitHub) (

GitHub)。

要解决此问题,请执行以下操作:

  1. 更新 AnimateDiff-Evolved:确保您正在运行AnimateDiff-Evolved插件的最新版本。插件的开发人员 Kosinkadink 提到,需要进行小规模重构才能使插件与 ComfyUI 中的最新更改兼容。更新主 ComfyUI 和AnimateDiff-Evolved应该可以解决问题​ (GitHub)。
  2. 检查节点依赖关系:如果更新后问题仍然存在,请检查任何节点或采样器特定的依赖关系(例如ComfyUI-GGUF)可能也需要更新,因为某些节点可能仍引用已弃用的参数,例如(copyGitHub)。

遵循这些步骤应该有助于消除错误并使插件顺利运行。

所以这时候,更新了comfyui的主程序版本到最新,报错问题解决!

ComfyUI-Flux-支持文本直出-模型跑图感受分享

我预计 Flux 模型将会是在视觉模型中长期霸榜,生成风格的多样性、对人物肢体的控制,都是其他模型无法比拟的。接下来我将展示2个流程来具体看看它的生成质量。

案例一 迪斯尼风格电影海报

首先,我用这张海报来进行文本反推来获取海报的关键词,使用工具:https://huggingface.co/spaces/fancyfeast/joy-caption-pre-alpha

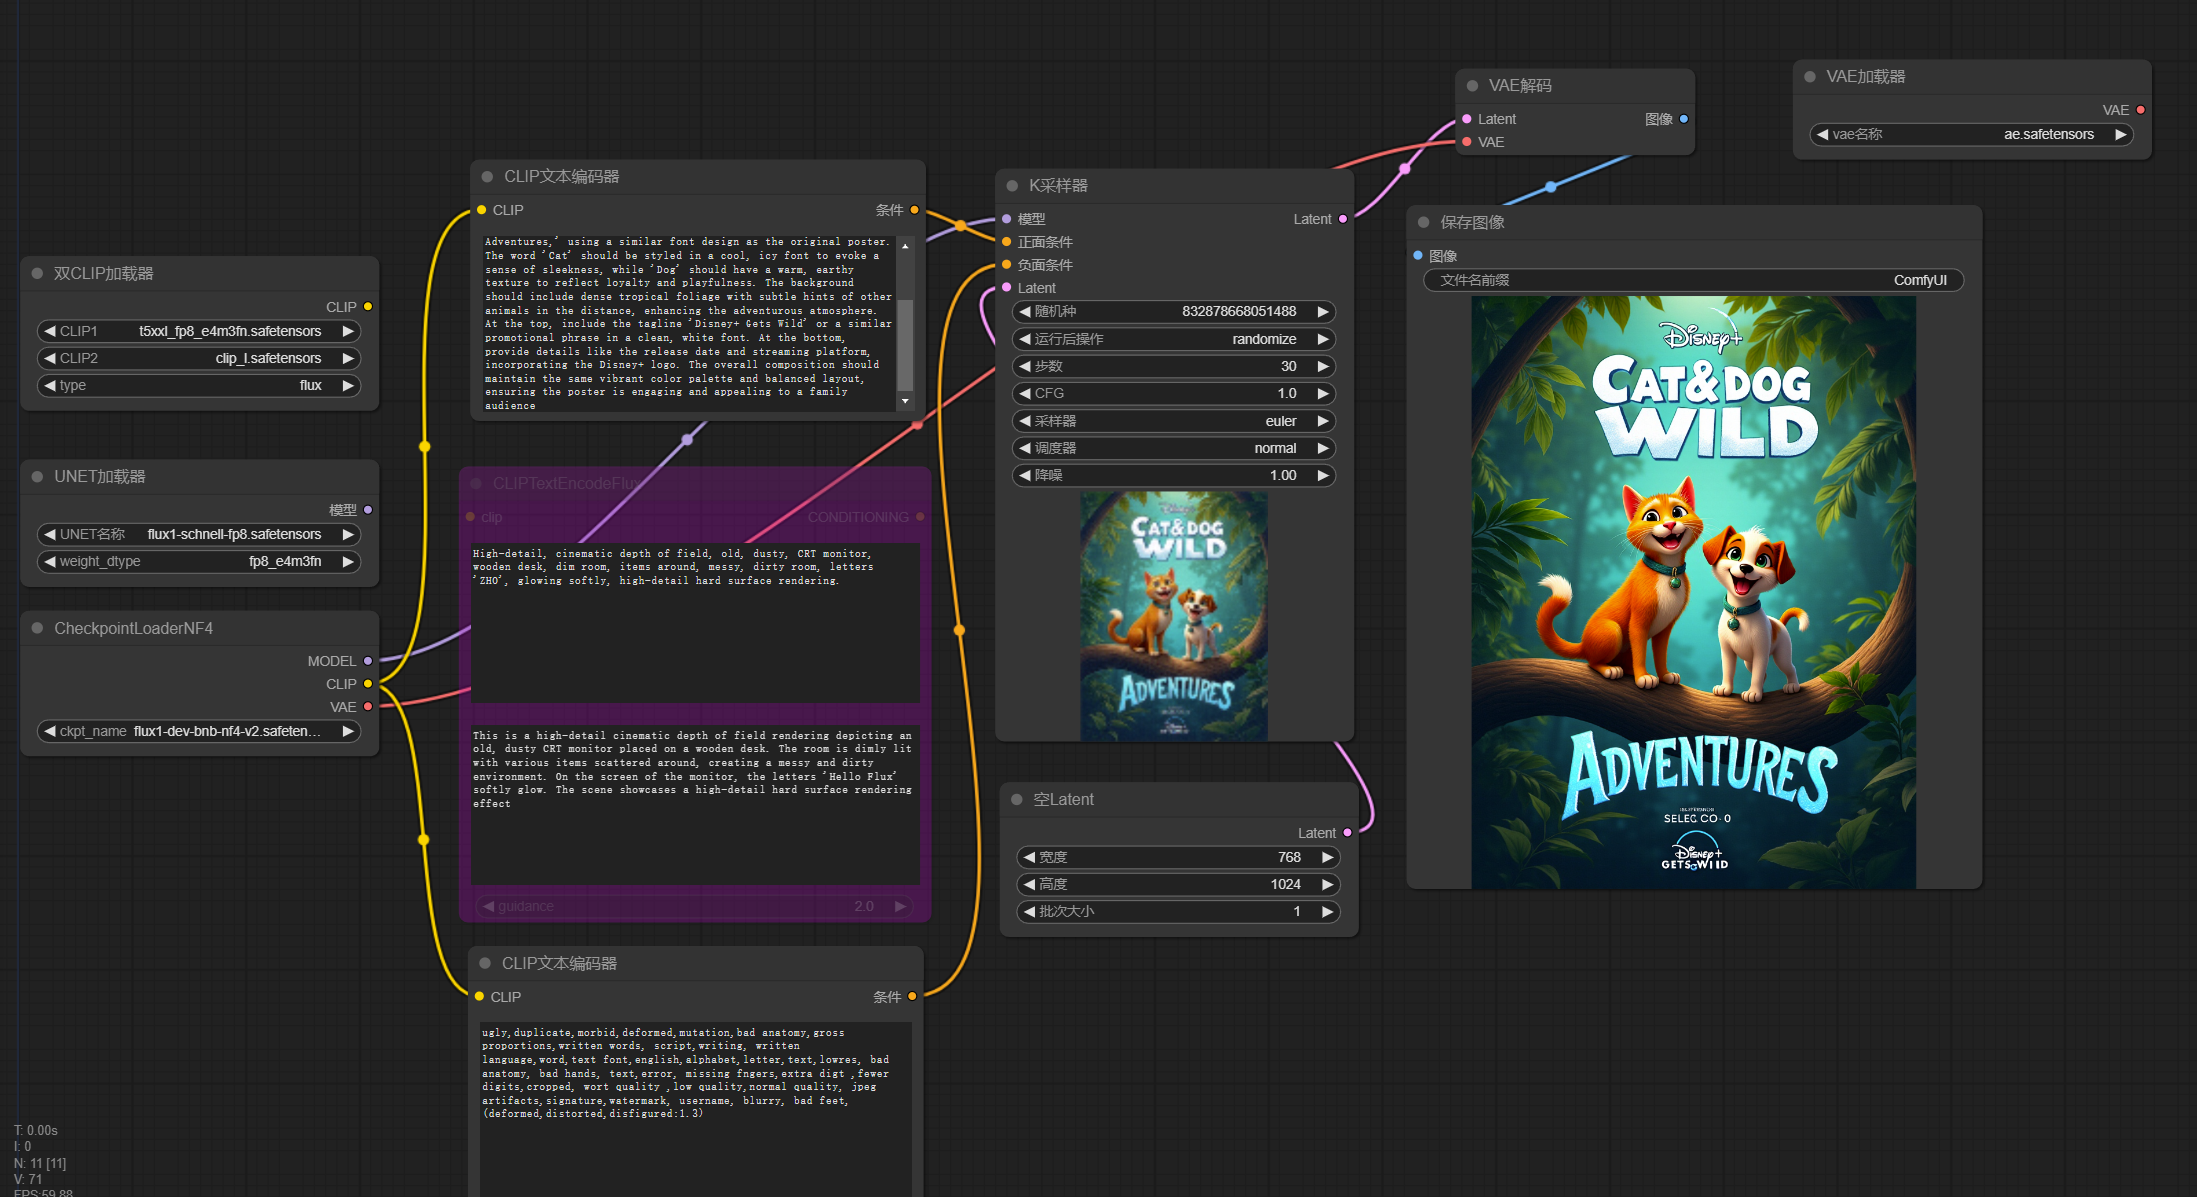
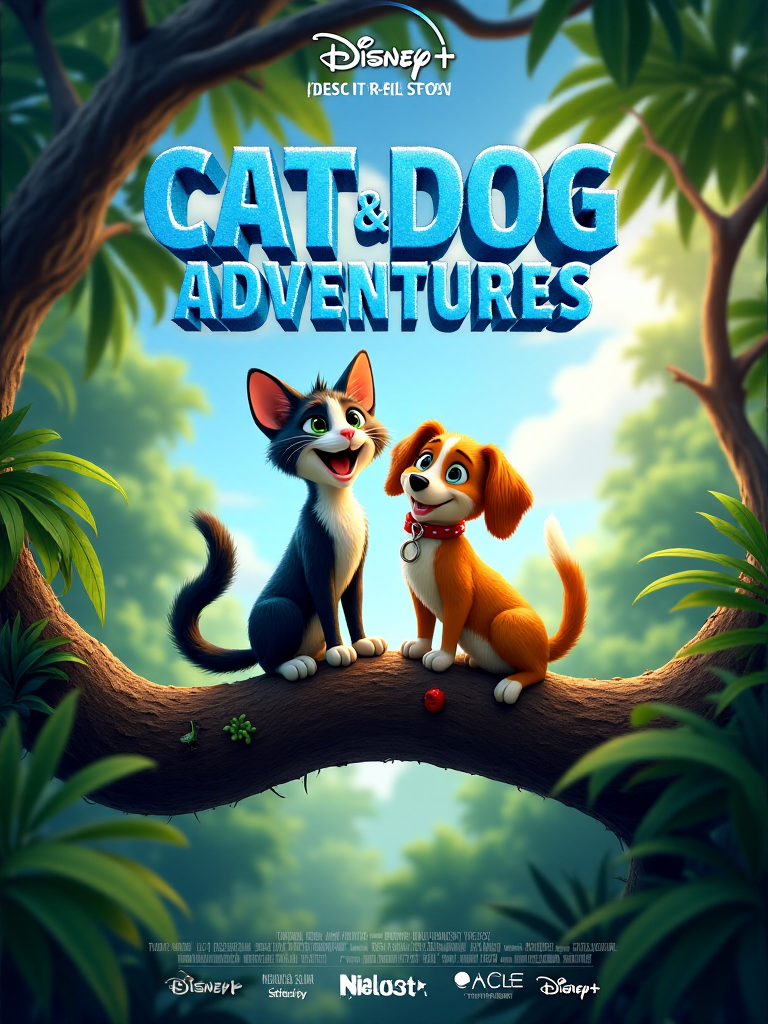
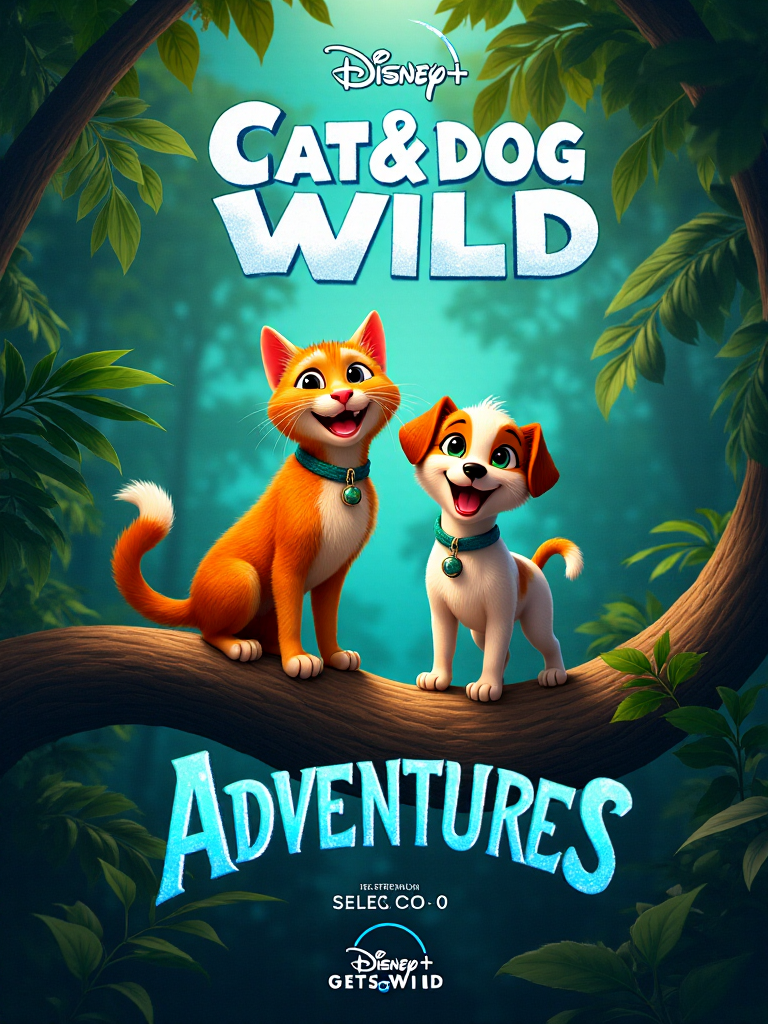
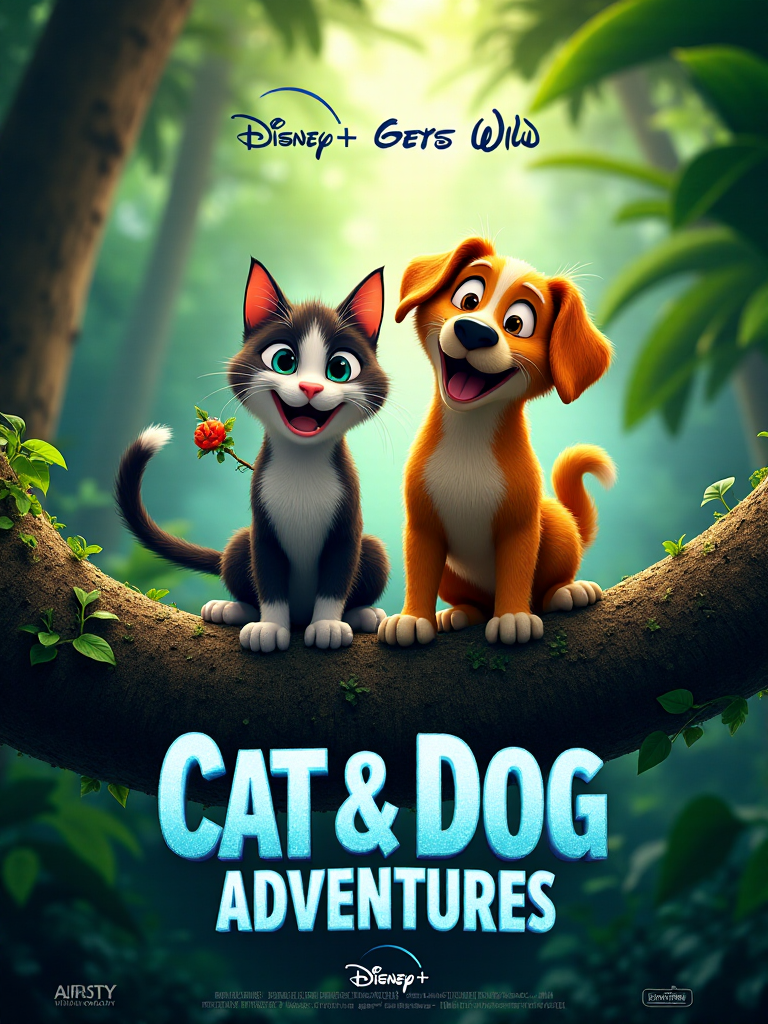
获得关键词如下:This is a digital promotional poster for the Disney+ animated film “The Ice Age Adventures of Buck Wild.” The image is a vibrant, colorful cartoon depiction set in a lush, jungle-like environment. The background features dense foliage, tall trees with broad leaves, and a variety of greenery, creating a sense of depth and immersion.

In the foreground, two anthropomorphic ground sloths, Buck and Crash, are prominently featured. They are standing on a large, gnarled tree branch, with Buck on the left and Crash on the right. Buck is holding a stick in his right hand and has a playful expression, while Crash is smiling and has his arms outstretched, as if excited. Both characters have light brown fur with darker brown stripes, and their eyes are large and expressive.

The title “The Ice Age Adventures of Buck Wild” is prominently displayed in large, bold, yellow letters in the center of the poster. Above the title, the text “Disney+ + gets wild” is written in white. Below the title, the Disney+ logo is visible, along with the phrase “Original movie from 20th Century Studios.” The poster’s overall style is bright and cheerful, with a playful, adventurous tone.

别小看上面这个反推工具,目前来说使用体验最好的,对图像的识别能力非常强。有兴趣可以制作成插件。跑题了,来看看我的工作流。

我使用的是flux_bnb_nf4_v2的checkpoint,直接简单的文生图流程,生成的效果如下:

我将海报中的两个角色换成猫和狗,海报输出的文字进行了修改,得到上图的效果。

案例二 3D 风格人像

依然是网上搜集的一张海报,赛博风格

依然用反推提示词,这里要注意。可能是这个反推文本模型存在一定的局限,这类人物角色它描述成二次元的风格。所以呢,我对此进行了适当修改,让他具备3d,blender技术效果。

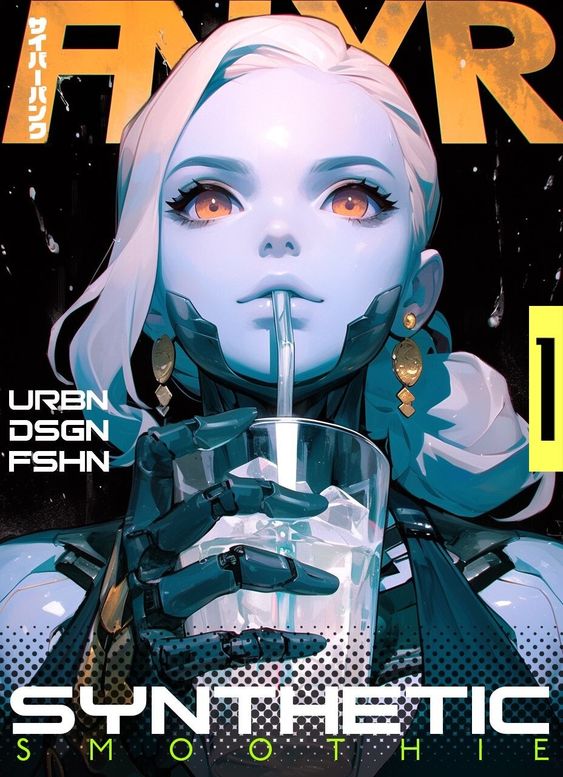
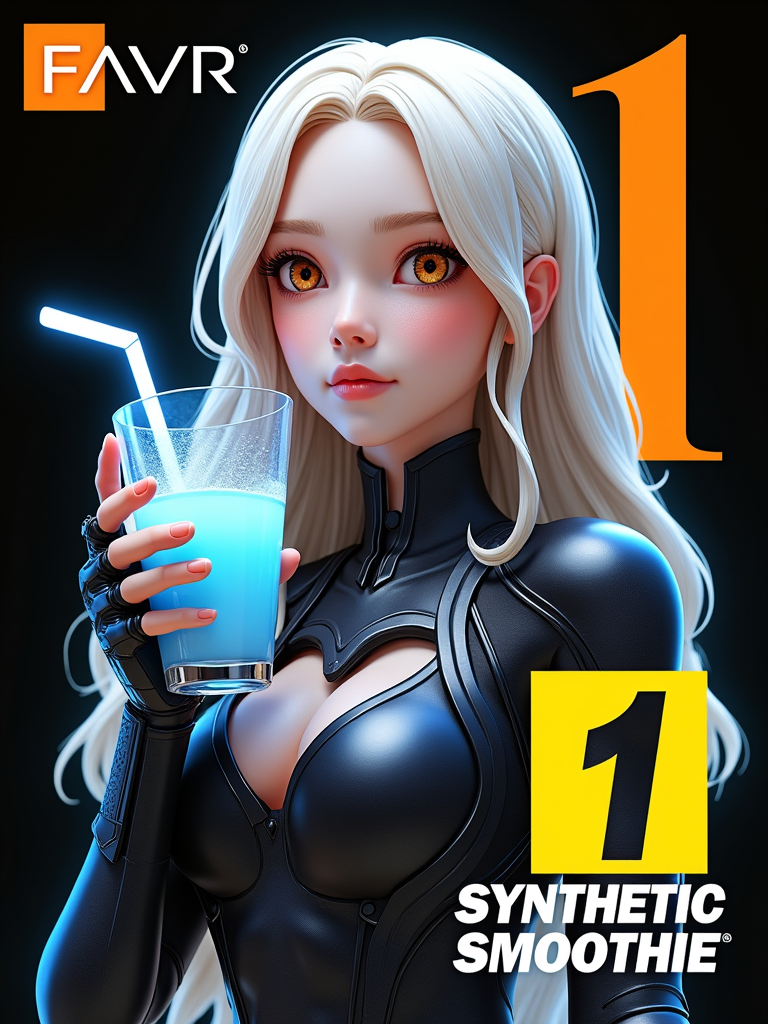
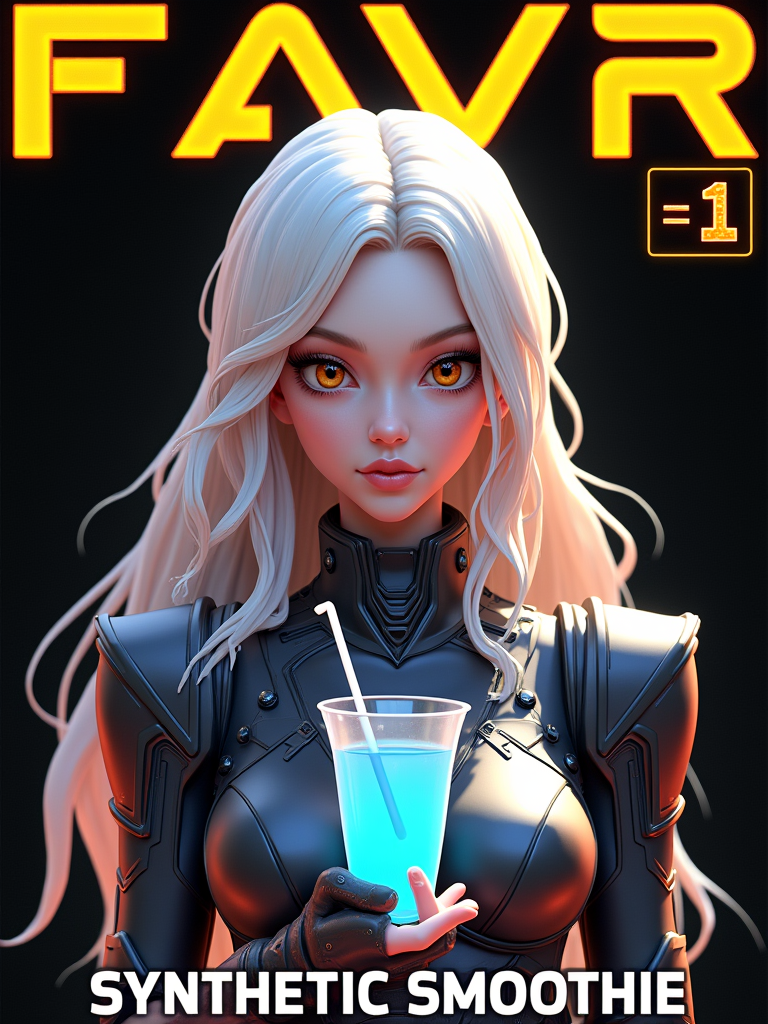
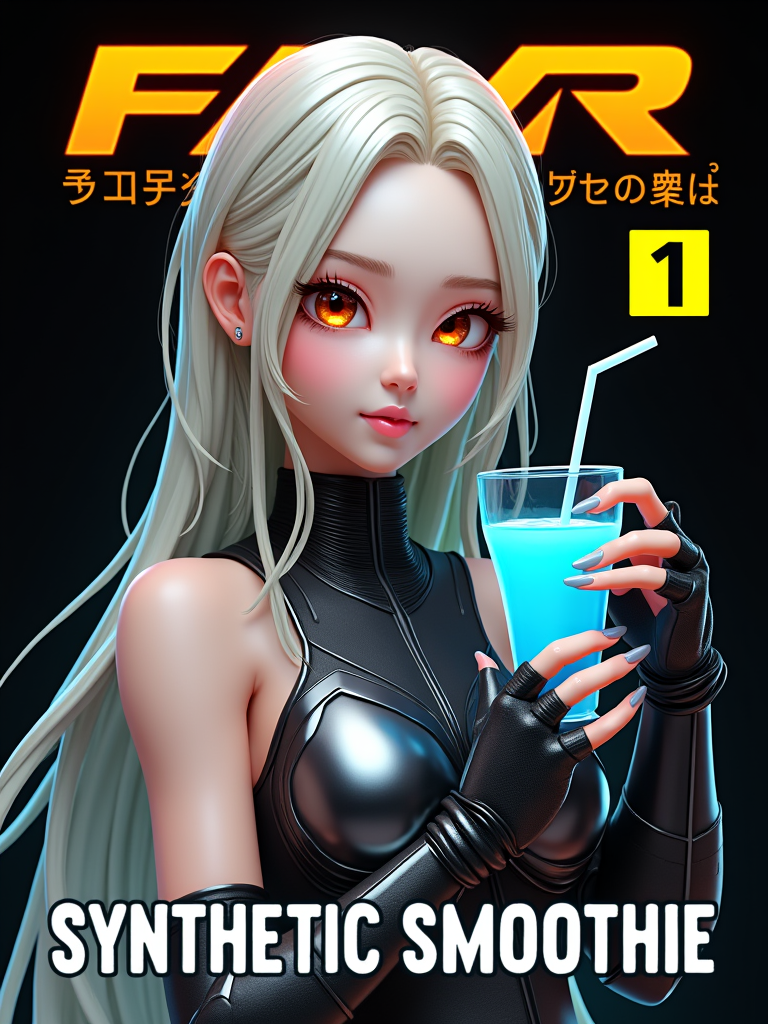
提示词如下:This image is a digital illustration, likely created in a comic book style, featuring a futuristic, cyberpunk aesthetic. The central figure is a young woman with pale blue skin and striking, large, orange eyes. Her hair is platinum blonde and styled in a sleek, high ponytail. She is dressed in a high-tech, form-fitting outfit with metallic accents, giving her a futuristic, robotic appearance. Her left hand, which is gloved in a black, mechanical-looking glove, is holding a clear glass filled with a refreshing drink, which she is sipping through a straw.

The background is predominantly black, with vibrant yellow and orange accents, creating a striking contrast that highlights the central figure. The magazine cover title, “FAVR,” is prominently displayed in large, bold letters at the top, with additional Japanese text on the left side. The word “SMOOTHIE” is written in bold, white letters at the bottom, emphasizing the theme of the cover. The overall color palette is a mix of cool blues and warm oranges, contributing to the high-tech, futuristic vibe of the artwork. The image is detailed, with a focus on the woman’s expressive face and the sleek, futuristic design of her outfit.

生成效果如下:

你可能会说,哟这手指怎么还是画不好? 你别忽略了一问题,要想画好手指需要搭配flux版的真实lora模型一块使用。(我为了水一篇文章,懒得再复现)

案例三 未来科幻风人像

参考图像

反推提示词,同样的方法,同样的操作,不再赘述

配置flux环境需要相应的节点支持

controlnet相关:https://github.com/XLabs-AI/x-flux-comfyui

节点安装到custom_nodes下

工作流可参考:https://github.com/ZHO-ZHO-ZHO/ComfyUI-Workflows-ZHO

本地部署相关扩展阅读:https://www.freedidi.com/13266.html

工具很好,真正的价值是使用者,在实际工作流中去解决问题